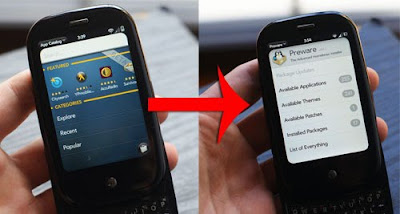
WebOS 1.2(.1) is here, and yes: It broke homebrew. Amazingly, it only took devs about two days to bounce back. Here's how to bring hundreds of free apps, tweaks and themes to your Pre, without flashing your firmware.
Why Homebrew?
Paid apps are due in the official App Catalog any day now—actually they're running a little late—meaning that the app selection is probably about to get a lot wider, and basically better. But webOS development is limited in scope, and App Catalog applications will never be able to theme your device, access 3D APIs that aren't in the MojoSDK, change your homescreen layout, or add an onscreen keyboard. Pre homebrew is as much about adding apps that Palm has been so slow to approve as it is tweaking your handset. Think of it like jailbreaking an iPhone, except that it's easier to do, and the benefits are much, much greater.
(This guide owes a huge debt to the PreCentral forums, where the developer of WebOS Quick Install, with others, have collected most of the necessar
y resources. Recognition is nice, but donations are better. If you find WebOS Quick Install useful, send Jason a few bucks.)
What You Need
This is the desktop program that effectively opens up your Pre for business. It's got quite a b
it of power on its own, but one of its greatest talents is the ability to install package managers like Preware, which make installing homebrew apps to
your Pre, from your Pre super-easy.
2. WebOSDoctor ROM (Sprint, Bell): This is just a restoration ROM for webOS, which WebOS Quick Install needs to work. It should be saved into the same di
rectory as WebOS Quick Install,
then left alone.
3. Java SE 6: Make sure you've got Java 1.6, or SE
6, so you can run these apps properly.
And one trick:
4. Dev Mode: Switching your Pre to dev mode is either so
rt of fun or sort of tedious, depending on your capacity for nostalgia.
All you have to do is type "upupdowndownleftrightleftrightbastart" on the keypad. That'll open a search query that'll uncover a new app on your Pre called "DeveloperMode." Run it, and it'll switch your phone into, you guessed it, developer mode.Running WebOS Quick Install
6. Open WebOS Quick Install, making sure that the WebOSDoctor ROM is in the same directory as the Quick Install JAR.
You'll get this message:7. When you reopen WebOS Quick Install, you'll be prompted to choose which kind of device you want to access. Choose "USB Device," which'll install the drivers necessary to crack into a physical Pre, not just an emulator.
8. Follow the driver installation prompts through to completion.
9. Open WebOS Quick Install again. You should see the app's home screen. Click on the bottom button in the right panel, as indicated here:Getting the Most Out Of Homebrew

Now that you're set up and ready to go, it's time to do stuff. Launch the Preware app on your Pre—at first load, it takes a while to sync up with all the repositories, so be patient—and explore the 200+ apps included by default. (You can add other repositories on your own, but most of the good stuff is already here.)
The "Package Manager Service" installation doesn't just enable downloads through Preware—it enables a whole range of WebOS Quick Install tweaks, which you can access through the Tools ->Tweaks menu. WebOS Quick Install may prompt you to install a few patches; just go along with it, it'll only take a second.
Once you're in the panel, you'll see a wealth of useful tweaks, from a 4-icon-wide app launcher, to a browser ad-blocker, to a user agent string changer, so your Pre asks for snazzier iPhone mobile pages instead of standard mobile fare. Generally, each tweak will restart your Pre.
As for that onscreen keyboard? You can install that through WebOS Quick Install: It's in the same place you found Preware, in the "WebOS-Internals Feed (all)" section of the package downloader. A word of warning: It's only officially supported up to WebOS 1.2.0, so you might be best advised to wait a few days until the developers have worked out any bugs with 1.2.1.
Anyway, the Pre Homebrew community is rich and fast-moving, so I'll let you all take it from here. Some great resources to get you started:
http://www.precentral.net/http://www.webos-internals.org/wiki/Main_Page
http://pimpmypre.com/
http://www.preyourmind.org/


No comments:
Post a Comment